Handmade Gift Guide: 15 Easy Free Knitting Patterns

handmade-gift-guide-1

As many people know Christmas is coming up and I’m super super excited, I love all the presents, baking, traditions, and family. So I’ve decided to start a series of gift guides both handmade ideas and buy-able things leading up to the holidays.

We’ll start with what I kind the easiest and fastest Arm Knitting Patterns.

1. Color Block Wrap from All Free Knitting.com

Color-Block-Wrap_Medium_ID-707248.jpg

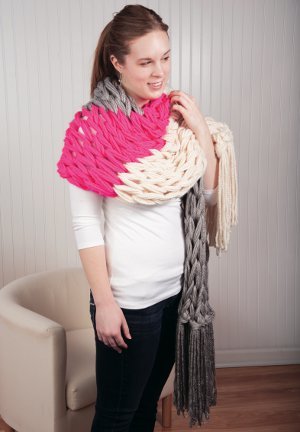
Because this is arm knit it’s super fast to make as a last minute gift and the cost is just a few skeins of extra bulky yarn. The color blocking also gives the wrap a very modern look.

2. Arm Knitted Fringe Scarf from Simply Maggie

how-to-arm-knit-a-fringe-scarf-copy1-838x1024

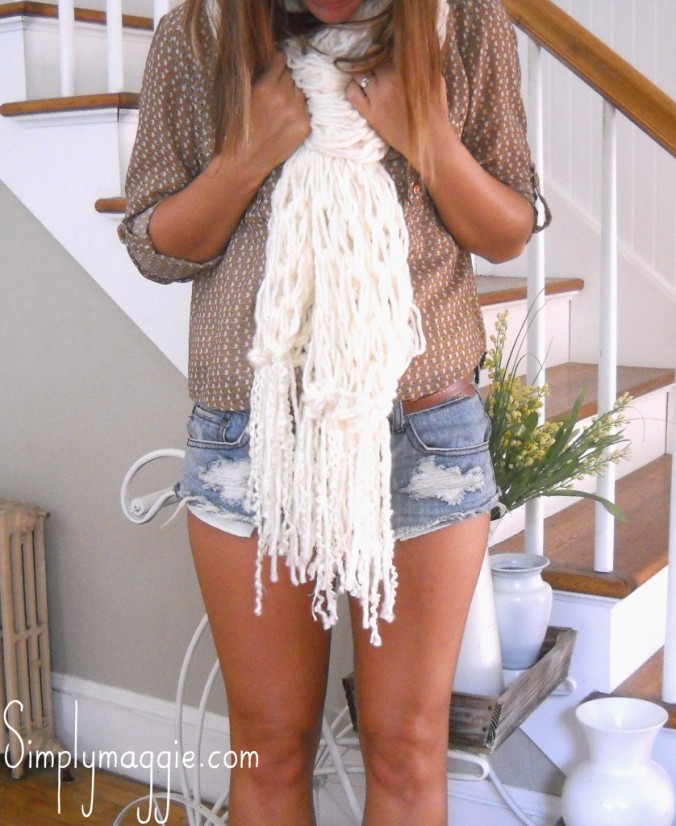
I love the fringe on this pattern and once again because it’s arm knitted it’s super quick.

3. 15 Minute Infinity Scarf from Simply Maggie

green-side-682x1024

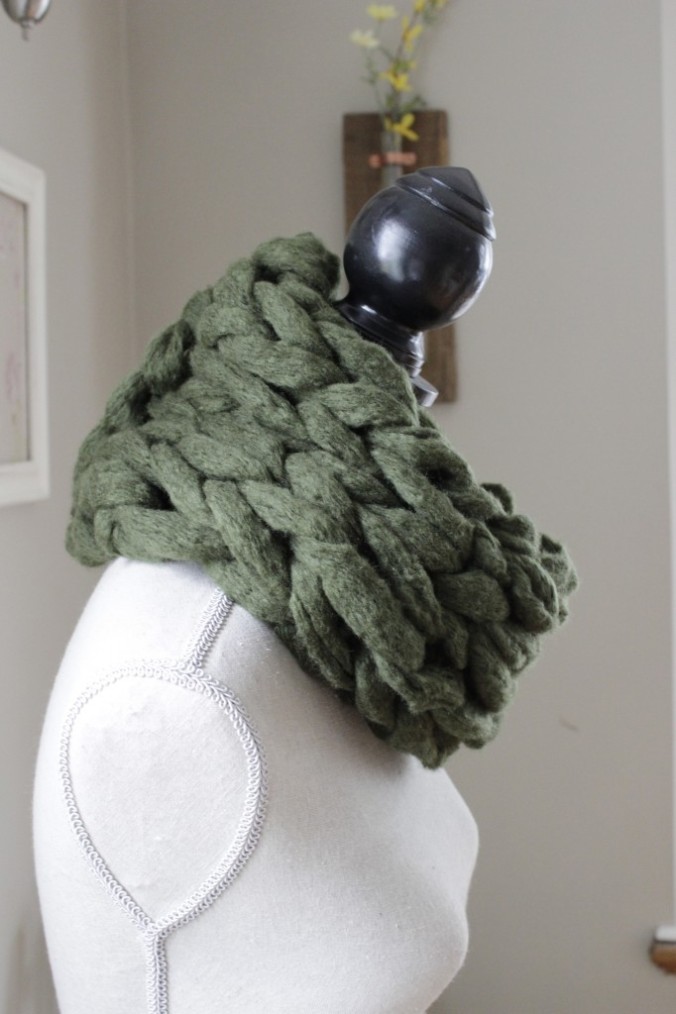
This maybe the fastest pattern on the list (only 15 minutes) and still would be a great and fashionable gift.

4. Arm Knitted Blanket from Mamabee

1-14

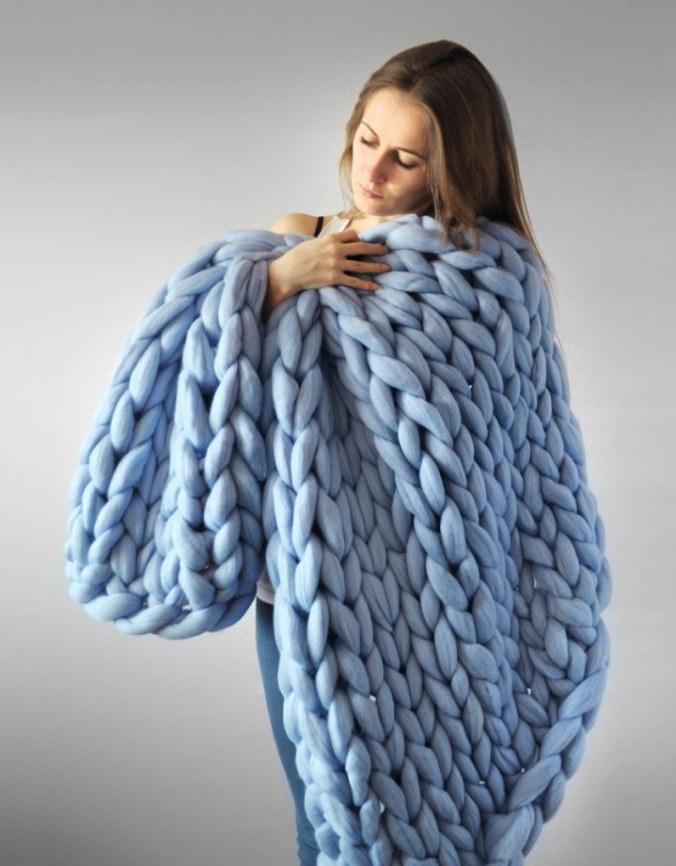
If you don’t kind spending a little more to buy extra yarn this would be a wonderful gift, and a quick one.

5. Giant Arm Knit Bunny from Sweet Paul

4980605_284854_bunny4

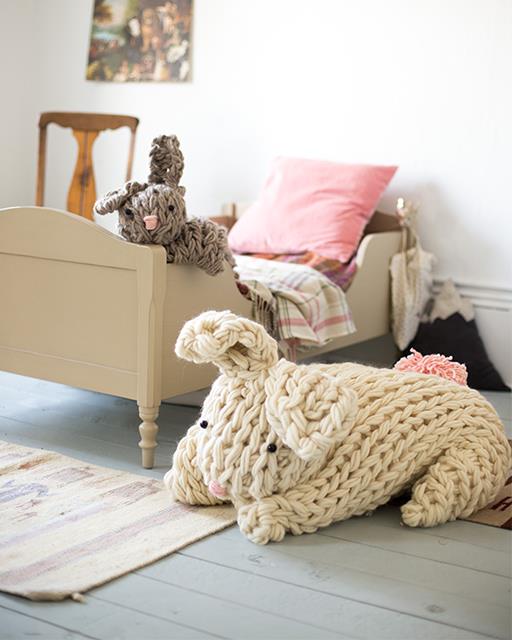
I love this project so much it’s just so cute and would be perfect for any kid (or an adult who’s a kid at heart). Like most arm knitting it’s also very easy.

6. Arm Knit Mermaid Blanket from Simply Maggie

14309897_532167500313805_6805748646882050048_n-4

These mermaid blankets have been everywhere this season and now you can make one as a gift or a gift for yourself with arm knitting. The colors used on this pattern are also just precious.

7. Arm Knit Pet Bed from Be Cozi

arm-knit-cat-bed-e1475980560726-768x634.jpg

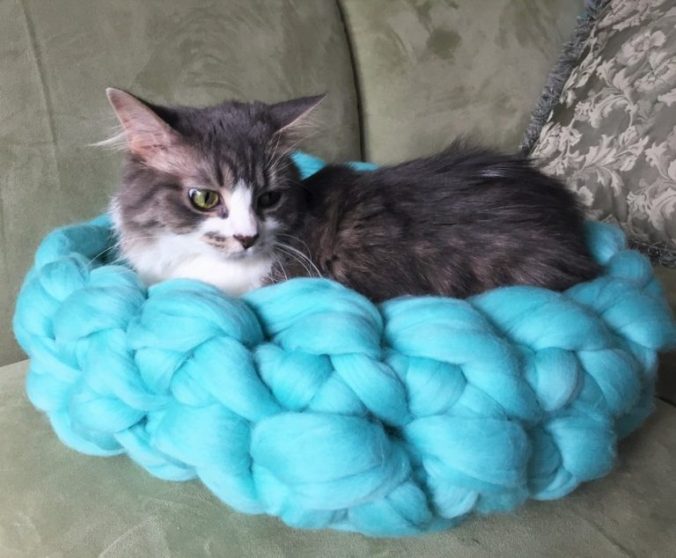
This would be a great gift for any pet lover in your life or a cute gift for your own pets.

8. Arm Knit Market Bag from Yarnspirations

marketbag.jpg

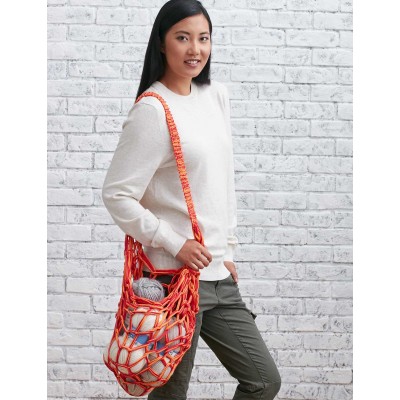
This would be a great gift for a friend who loves farmers markets and all things eco-friendly.

Now onto regular knitting patterns.

9. Hot Mess Headband from Ewe Ewe

119_hot_mess_headband.png

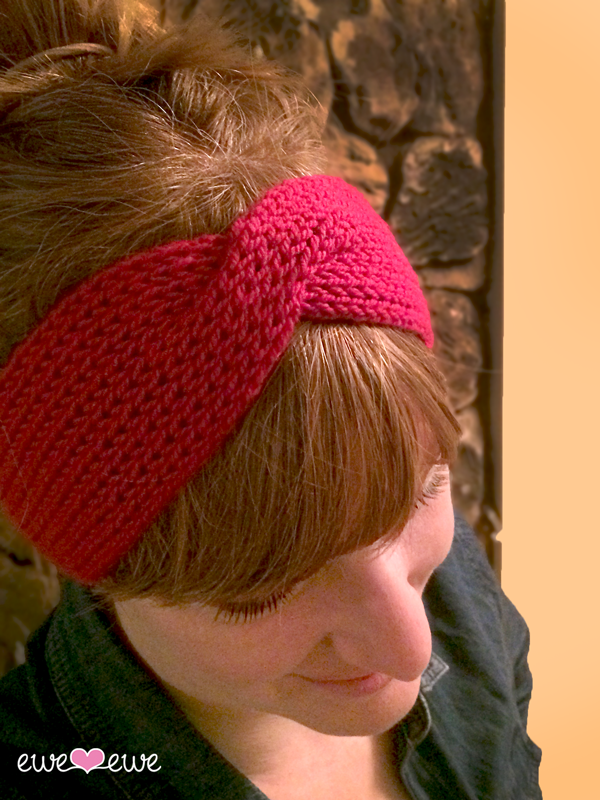
These are really cute and use so little yarn you could make a bunch of them for sisters or any awesome girl gang.

10. Easy Fingerless Mitts from Roxanne Richardson

3907835926_ca081a7efb_n.jpg

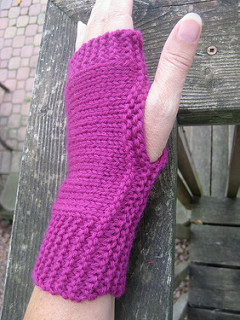
I’ve made this pattern before and I love it, it’s easy fast and can be made with many types of yarn.

11. Emerald Green Handwarmers from Creative Yarn

emerald_handwarmer2.jpg

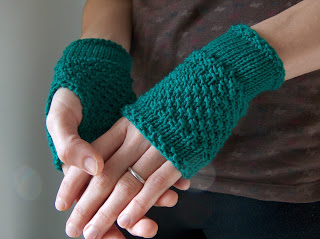
Another variation on the handwarmers with a little more texture.

12. Harry Potter Phone Sweater from Pattymac Knits

PKM_0165asm.jpg

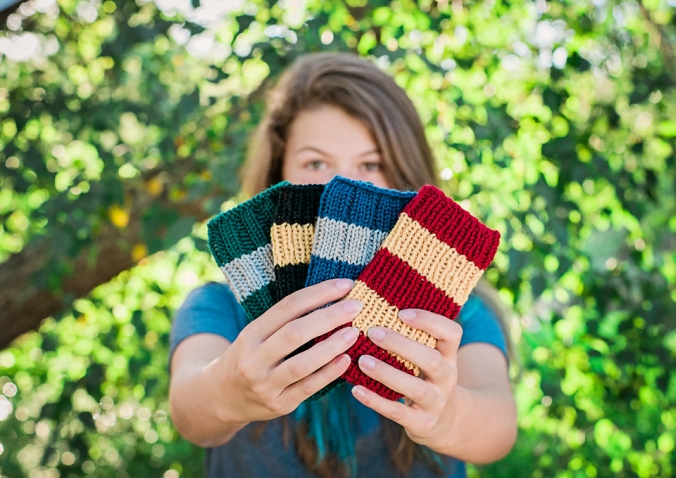
A cute and fast gift for Harry Potter Fan in your life.

13, 14, and 15 (plus a few more) 5 Hat Patterns from Nature Whispers

super_soft_merino_hats-600-2.jpg

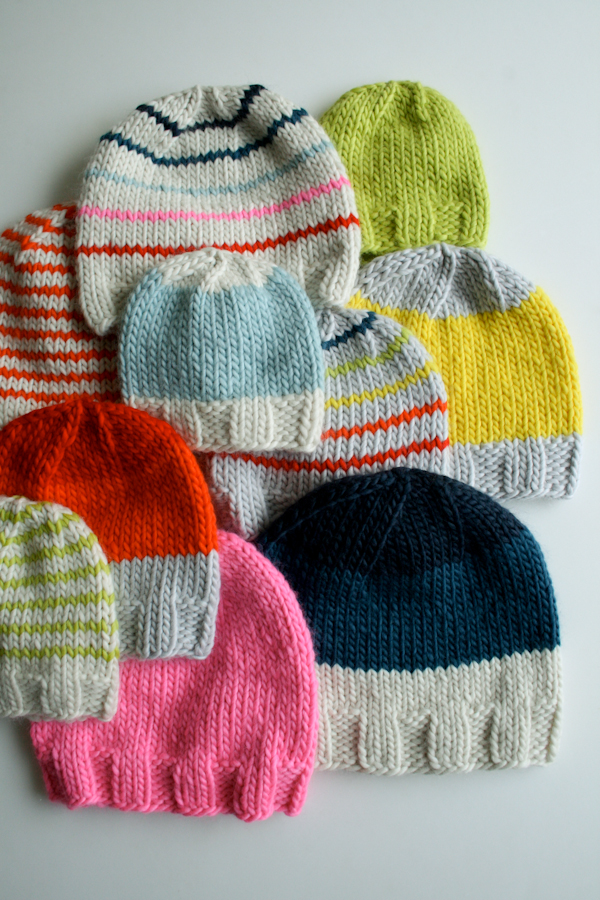
Make up a bunch of different hats and they’re a perfect gift for pretty much anyone.

Thanks for reading and happy knitting,

Monty.


Super Easy Vegan (or not) Cinnamon Rolls

vegan-rolls

As stated in my previous posts my brother is vegan and a few weeks ago I made non-vegan cinnamon rolls making him a little jealous so I promised him I’d make him vegan ones, thus after a bit of perfecting this recipe. Note this takes a little time but it is super easy.

Ingredients:

Cinnamon Rolls:

  • 1 packet instant yeast
  • 1 cup almond milk (or any other non dairy milk)
  • 1/2 cup vegan butter
  • 3 cups flour (divided into 1/2 cup measurements)
  • 1 1/2 tbsp cinnamon
  • 1/2 cup sugar
  • dash of vanilla
  • dash of salt

Glaze:

  • 1 cup powered sugar
  • 1-2 tbsp almond milk
  • dash of vanilla

First heat and mix 3 tbsp vegan butter and 1 cup almond milk until butter is melted.

IMG_5696 (2).JPG

Let it cool until you can dip your finger in and it feels warm but not hot, pour into a mixing bowl and add yeast. After letting it set to activate for 10 minutes add salt and 2 tbsp of sugar. Then start adding in your flour 1/2 cup at a time kneading your dough into a ball. Once all your flour has been added take the dough out of the bowl coat sides with oil and put dough back in bowl. Cover with a wet cloth and leave to rise for about an hour (I went to the store and shipped some etsy orders then came back to check on mine). Once it has doubled in size roll it out into a flat rectangle.

IMG_5700.JPG

Melt the rest of your vegan butter, mix in your dash of vanilla, and brush over the dough. Then sprinkle your cinnamon and the rest of your sugar over the rectangle. Roll the dough up and then cut into 1-2 inch pieces.

IMG_5703.JPG

Grease a 8 by 12 pan very well then put in all your cinnamon rolls.

IMG_5705.JPG

Bake at 350 for 25 to 30 minutes. While these bake prepare the glaze, mix the powdered sugar, 1-2 tablespoons almond milk, and vanilla. I like to pour the glaze on as soon as the cinnamon rolls get out of the oven because it makes them extra gooey and yummy. Enjoy.

Thanks for Reading,

Monty.

Super Easy 3 Ingredient Nutella Turnover

nutella-turnover

As it’s getting closer to the holiday season I get more excited about holiday baking (my pinterest board already has 100 plus Christmas cookie recipes). One of the key parts of holiday baking for me is making delicious breakfast foods for my extended family when they’re all staying over; so I made this super easy turnover recipe you can make without getting up extra earlier.

Ingredients:

  • Jar of Nutella
  • Pastry Puff Sheets (each sheet makes 4 turnovers)
  • 1 egg

To start you’ll want to let your pastry puff sheets thaw.

img_5644

Once it can easily be bent and unrolled cut into four pieces and lay out on parchment paper. Put a little nutella in each turnover then hold over and use a fork on the edge.

IMG_5646.JPG

IMG_5649.JPG

Heat your oven to 400 degrees, then beat your one egg and brush the egg wash over each turnover. Line a pan with parchment paper and once the oven is completely heated bake for 12-15 minutes.

Then you’ll have super yummy and super easy turnovers that you don’t have to get up extra early to make.

Thanks for Reading,

Monty.

DIY Perler Bead Cactus Magnets

perler-bead-cactus

So this one is a little late, because of my crazy Halloween weekend (not really I was on my little cousins birthday trip, taking her to American Girl, and high tea). That being said I just found out my big craft cabinet is magnetic so of course I had to make some perler bead magnets for it. I always miss summer and plants and bright things so I decided to make these little cactus plants. Without further ado lets make them.

Materials:

  • Green Perler Beads
  • Red Perler Beads
  • Yellow Perler Beads
  • Orange Perler Beads
  • Magnets
  • A Strong Glue

To start simply lay out all your perler beads in the pattern of your choice (or make all three like I did). Here’s all three patterns:

img_5535

img_5538

img_5539

Then iron your design with ironing paper. After letting it cool take your magnets and strong glue and attach them to the back and let dry (I left mine for about 12 hours). I love how they turned out bright and colorful, exactly what I need as we head towards the winter.

Thanks for Reading,

Monty.

Vegan (or not) Mini Shortbread

mini-shortbread

As stated in some of my previous posts I’m really excited about Halloween so I made these little treats with Halloween sprinkles (though you could make them for any holiday with themed sprinkles).  I also made this recipe vegan so my younger brother could enjoy them too, they can easily be made not vegan though if you would like. Without further ado let’s get into the recipe.

Ingredients:

  • 1/2 cup vegan butter replacement (I used earth balance)
  • 1/4 cup powdered sugar
  • 1/2 tsp vanilla extract
  • 1 1/4 cup of flour
  • 4 tbs sprinkles of your choice
  • 1 tsp water

(Note: replace the vegan butter replacement with regular salted butter if you would like it to not be vegan)

Instructions:

Preheat your oven to 325. Start by slightly softening the butter then mixing all ingredients until it looks like thick dough, once it has mixed flatten out with your hands or a rolling pin on a flat surface. Here’s what mine looked like:

img_5594

I used a small shot glass to cut out my mini circles this recipe will make between 24-36 mini cookies. Next lay them on an un-greased cookie sheet and bake for about 15 minutes or until the bottoms just start to brown. Then enjoy 🙂

Thanks for Reading,

Monty

Etsy Spotlight: October 2016

etsy spotlight October 2016.PNG

So this is the first post in a series I’m calling Etsy Spotlight, each post shows what I bought on etsy in the month the shop I bought it from and my review of the item. I love etsy and I believe if you sell on etsy you should buy off etsy when you can (you can check out my store here if you’re curious). Just a note I bought these products on my own and paid full price for them (if this ever changes in the future I will let you know).Without further ado we can get into the reviews.

Dark Chocolate Whiskey Truffles from Sweet Addict

il_570xN.297697694.jpg

I bought these for my dad for his birthday and he absolutely loved them, they are each individually wrapped and were shipped quickly so they were super fresh. The only thing to note is that they are a little smaller than they look in the picture.

Overall: 5/5

Olive Wood Fake Ear Plugs from Wood Ear Plugs

il_570xN.830778501_2sdp.jpg

I ordered these for myself because I love natural looking jewelry and I find the flat backs really comfortable to wear even when I’m sleeping. I found they’re really well made and I’ve been wearing them for a few weeks and have been very happy with the quality. The only issue I see is in the picture itself the ones I received didn’t have near as many lines or patterns (obviously all wood is different but this was a little extreme).

Overall: 4/5

Amethyst Stud Earrings from The Kaleidoshop

il_570xN.1070666325_exos.jpg

I ordered these to wear with the wood earrings above (to keep with the natural theme) and I absolutely love them. I’ve worn them everyday since I got them. Also the seller was really kind and helpful in making sure I got the right size (not to mention the beautiful photography).

Overall: 6/5

Kraken T-Shirt from SkipnWhistle

il_570xN.588286965_187g.jpg

So I love this shirt, I ended up ordering a size too big so I’m gonna sleep in it but serious I love the design and it’s quite well made. I honestly also love that I got it on sale.

Overall: 5/5

Boxer Pattern from Stitch Upon a Time

il_570xN.753816618_eu65.jpg

I was really happy with this pattern, I made the shorter version for myself and I love them. Also I love that I can print as many copies of it as I want to cut out all the sizes. I would recommend pdf patterns over print patterns any day because you can print as many of them as you want.

Overall: 5/5

Shop small business and thanks for reading,

Monty.

Crafting Hack: Washi Tape Storage Box

washi-tape-storage-hack

Fair warning this post will be a little rant-y because of the insane price difference in this product. So I love washi tape, probably to the degree I have a bit of and addiction to it. And I’ve been looking for a way to store it (especially an easy to store it and travel with it). And I found these awesome cases at my local Walmart in the fishing section for 3.98.

Here it is:

IMG_5311.JPG

I ended up buying two of them and I absolutely love them they fit all of my washi tape with a little space to spare that I put ribbon in. These fit every different roll of washi I have and I have a lot of different brands. Also as you can see in the picture they have dividers you can add or change depending on the compartment size you want.

Now we’re getting to the rant-y part, I found this box exactly the same just marked differently with a pink label at Hobby Lobby for 14.99, 14.99, more than I payed for two of the Walmart boxers. I’m so frustrated about this seriously when it’s marketed as a tackle box its 3.98 but when its marketed as a washi tape box its 14.99, that’s just insane.

I’m currently in Boston with my wonderful wonderful lady love so this articles has fewer pictures than usual.

Thanks for reading my rant-y post,

Monty 🙂

DIY Chain Perler Bead Bracelets

chain-bracelet

As some people may have seen from the week’s earlier post, I’m really excited about the holiday coming up, Halloween. So I made this chain bracelet in line with the season. Two of these would be perfect to compliment a ghost or haunted in general costume.

Materials:

  • About 2oo grey beads
  • About 100 black beads
  • Glass Jar
  • Ironing Paper
  • Iron
  • Pegboard
  • Hot glue Gun
  1. Layout your beads in this pattern (add as many chain lengths as you want I added one more after what was shown): IMG_5479.JPG
  2. Iron one side of your creation (using the ironing paper of course).
  3. Hot glue the two ends together to form a bangle bracelet: IMG_5486.JPG
  4. Place the bracelet around a glass jar and inch by inch iron the bracelet around the jar with ironing paper (image below): IMG_5488.JPGIMG_5490.JPG
  5. Enjoy.

I’m really happy with how this one turned out and I’m excited to wear it to a few upcoming Halloween parties.

Thanks for reading,

Monty.

DIY Vintage Style Book Cover

vintage-book-cover

I created this book in honor of Halloween (one of my absolute favorite holidays). It’s an easy tutorial to customize to almost any journal use. I decided to put my star sign (a Pisces) on the front but you could put anything. So without further ado here’s the tutorial.

I started with a sketch book (the one I keep in my craft room) and then drew my symbol with a white crayon. (As you can see I may have messed up a little the first time).

IMG_5473.JPG

Next trace your white crayon outline carefully with a hot glue gun.

IMG_5474.JPG

Let it cool then start overlaying this with tissue paper and modpodge (the tissue paper can be any color because you’ll paint over it). Here’s what mine looked like after a few coats.

IMG_5483.JPG

After letting the modpodge dry and seal I started painting mine with acrylic paint. I mixed a metallic light blue and green glitter because I was going for any ocean-y theme.

IMG_5511.JPG

Here’s what my book looked like after a few coats.


IMG_5521.JPG

And finally I took a little bit of gold metallic paint to add some details.

IMG_5526.JPG

All done, and this could be easily modified with different colors or symbols.

Thanks for reading,

Monty.

Crafting Hack: DIY Measuring Table

diy-measuring-table

This is the first of my post series on crafting hacks, little lifehacks to make crafting easier (coming out every Sunday). So I got this patterned masking tape at Walmart (for I think 3.49) and then easily cut it and edged my crafting table. It turned out better than I thought it could. I use it all the time and now always have a way to measure easily available.

IMG_5468.JPG

Variation: If you wanted to make this with stuff you already had at home you could easily edge a table with plain duck tape or washi tape and then take a ruler along it adding the scoring lines.

Thanks for reading,

Monty.